SSO/SAML
Getting started with SSO/SAML for your company is fast and straightforward. Scalar is designed to support seamless onboarding, offering step-by-step guidance so you can get your team connected with secure, single sign-on in just a few minutes.
Scalar supports SSO/SAML integration with the following providers:
- Auth0
- Microsoft Entra ID (Formerly Azure AD)
- Okta
- OneLogin
- Ping Identity
- Email support@scalar.com to check compatibility with your provider.
What is SSO/SAML?
With SSO (Single Sign-On), users only need to create and use one main account to access multiple applications, instead of making separate accounts and logging in to each app individually.
SAML (Security Assertion Markup Language) is a technical standard used to implement SSO. It defines the protocol and data format that enables your identity provider and applications to securely communicate authentication and authorization information.
Set up SSO/SAML with Scalar
The setup process does not require complex configuration. You will be able to enable enterprise-grade authentication and access control for your organization – no matter your technical background.
Requirements
- SSO/SAML requires a Scalar Enterprise subscription. Read more about our pricing.
- You are the owner or admin of your Scalar team.
1. Create a SAML Application in Your Identity Provider
In your identity provider (IdP), create a new SAML application for Scalar. The exact steps vary by provider, but generally you will:
- Navigate to your IdP's application or SSO configuration section
- Create a new application or enterprise application
- Select SAML as the authentication method
- Give the application a name (e.g., "Scalar")
Refer to your provider-specific guide for detailed instructions.
2. Assign Users and Groups
After creating the application, assign the users and groups that should have access to Scalar. This is typically done in your IdP's user management or application assignment section.
3. Create a Connection in Scalar
Before configuring SAML settings in your IdP, create a new SSO connection in Scalar:
- Navigate to Team > Security in your Scalar Dashboard
- Under Advanced Security, enable Single Sign-On
- Click Setup Connection to create a new SSO connection
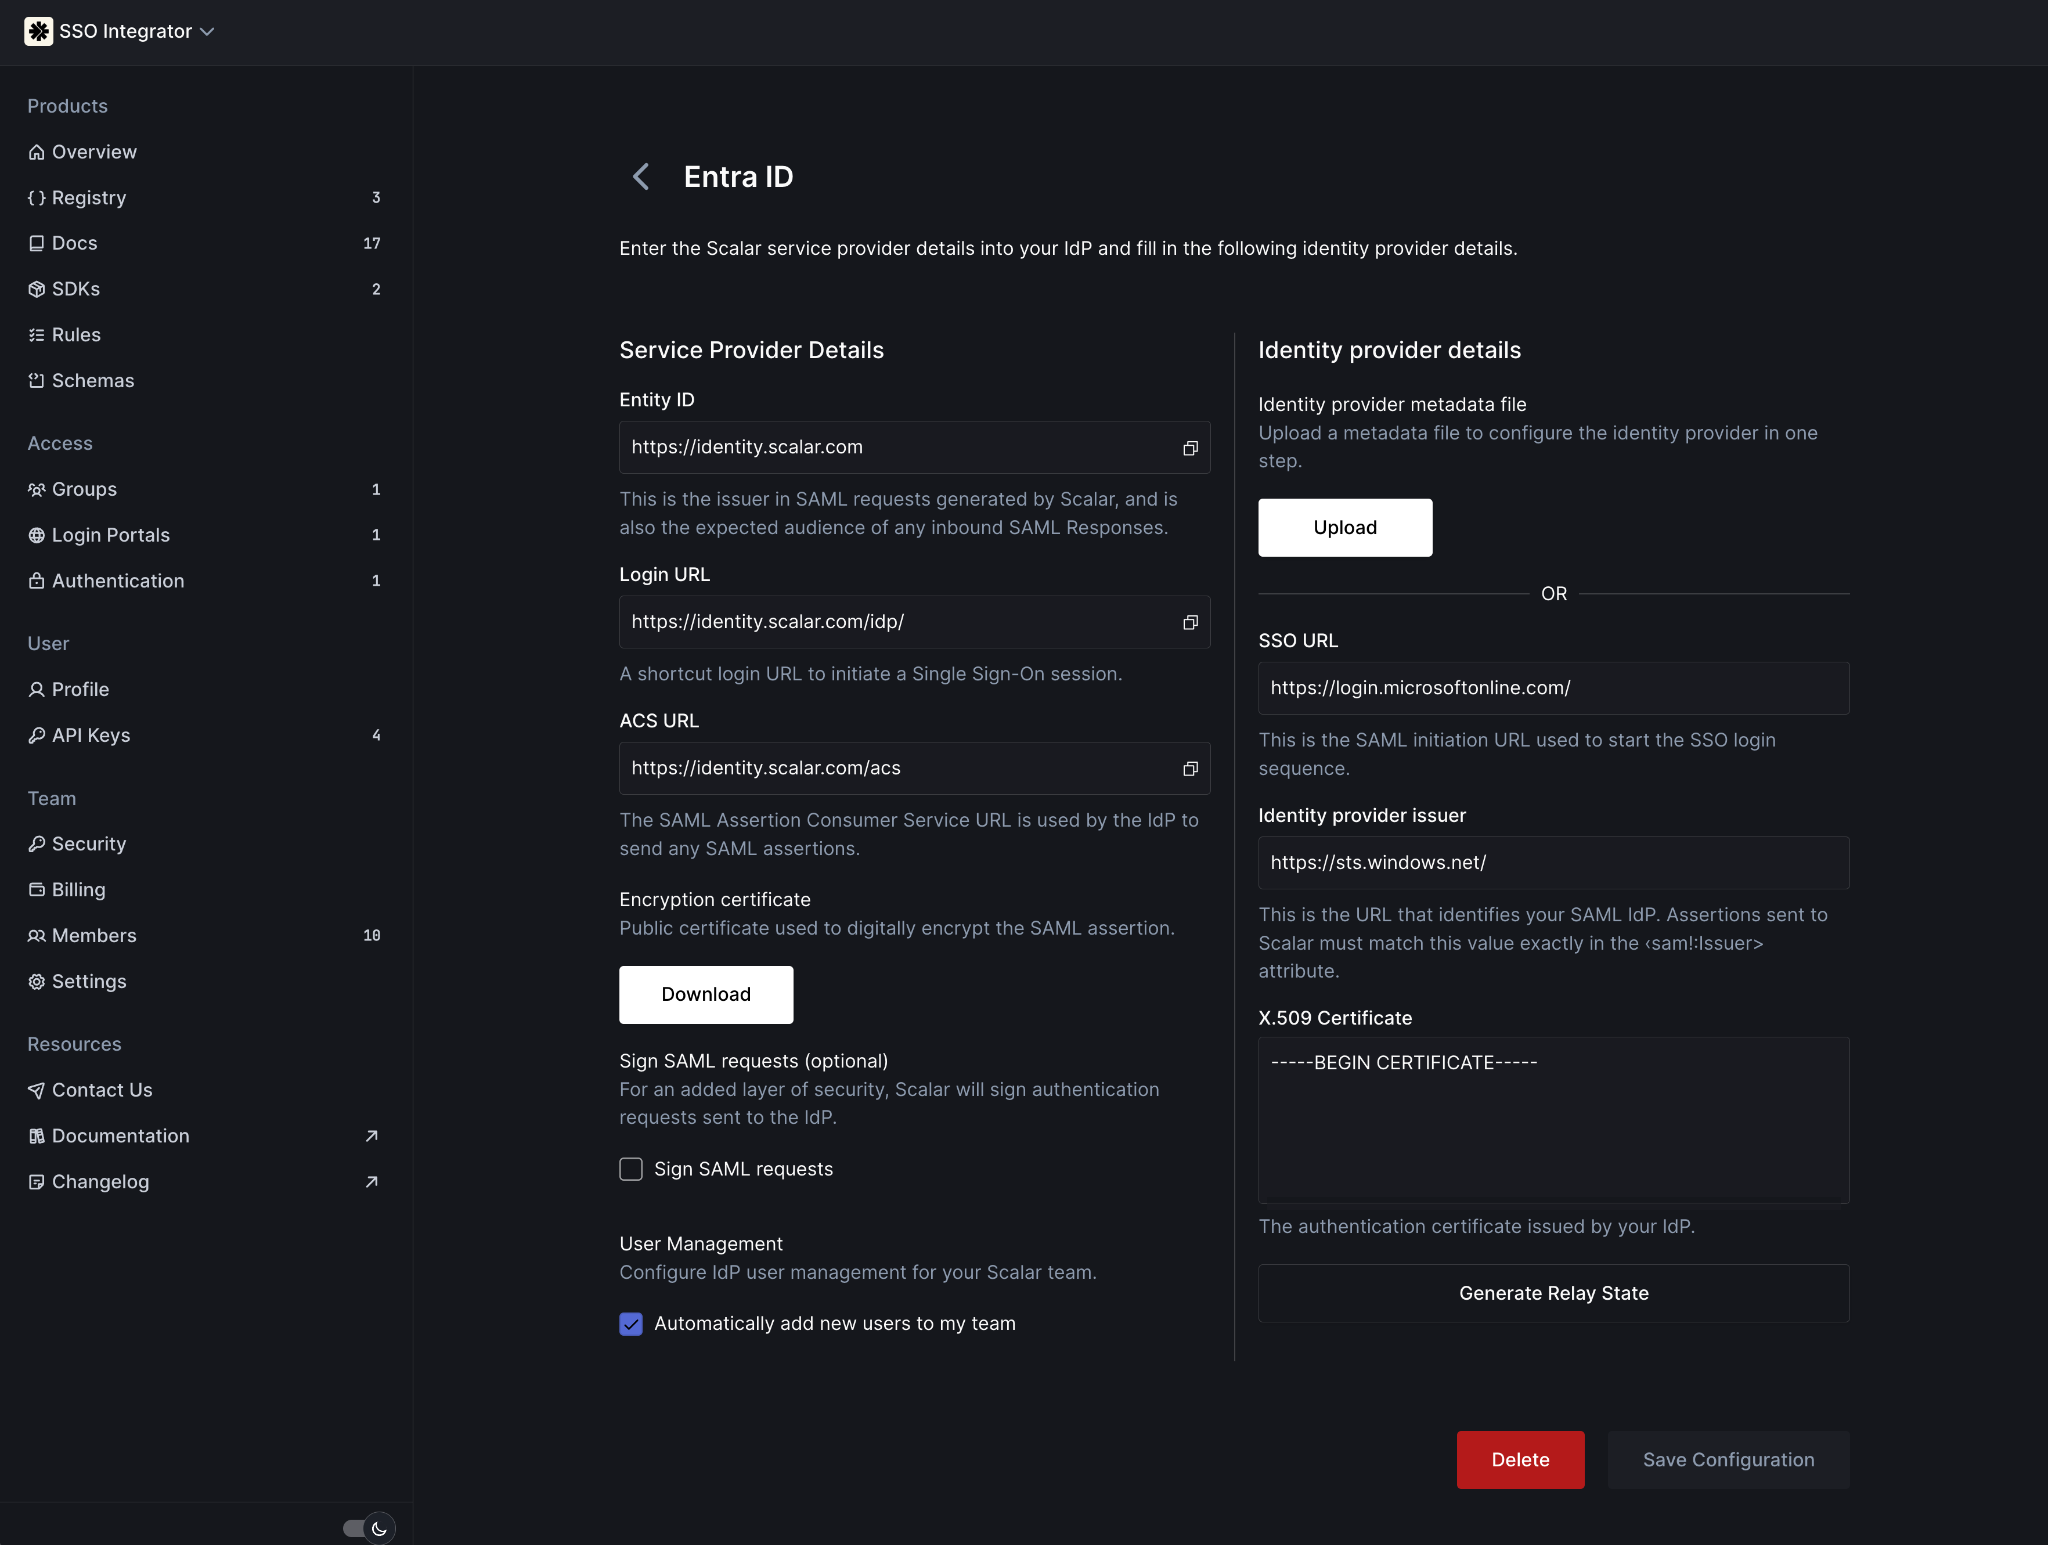
Connection in Scalar
4. Configure SAML Settings in Your Identity Provider
Configure your IdP's SAML settings with the following service provider details from Scalar:
| Field | Value |
|---|---|
| Identifier (Entity ID) | https://identity.scalar.com |
| Reply URL (Assertion Consumer Service URL) | https://identity.scalar.com/acs |
| Sign on URL (Optional) | "Login URL" from Scalar |
| Relay State (Optional) | "Generate Relay State" in Scalar |
Different identity providers may use different terminology for these fields. The Entity ID may be called "Audience URI" or "Identifier". The Reply URL may be called "ACS URL", "Callback URL", or "Single Sign-On URL".
5. Copy IdP Details to Scalar
After configuring your IdP, copy the following details from your identity provider into Scalar:
| Scalar | Identity Provider |
|---|---|
| Login URL | SSO URL / Single Sign-On URL / SAML Endpoint |
| Identity Provider Issuer | Entity ID / Issuer URL / IdP Identifier |
| Certificate (Base64) | X.509 Certificate / Signing Certificate |
These values are typically found in your IdP's SAML configuration, metadata, or certificate section.
6. Enable Token Encryption
Scalar requires token encryption for SAML assertions. To enable this:
- Download the encryption certificate from the Scalar SSO configuration page
- Import this certificate into your identity provider's token encryption or certificate management section
- Enable token encryption for the Scalar application
Not all identity providers support token encryption in the same way. Refer to your provider-specific guide for detailed instructions.
Done!
Once you have completed these steps, your organization is ready to use Scalar SSO! If you run into any issues, double-check your settings or follow our provider-specific guides for more detailed instructions. You can also reach out to our support team – we're here to help!
